Two buckets. Same word on the label. Completely different materials inside. That's the trap with lime, and it catches people who otherwise know their trade well.
Talk to a mason restoring a fourteenth-century church wall and to a gardener liming a clay lawn, and you'll hear the word "lime" used for products that share almost nothing beyond calcium. Hydraulic lime sets by reacting with water. Non-hydraulic lime sets by pulling carbon dioxide out of the air. Get that backwards on a soft stone wall and you'll watch your pointing crumble within a winter. Get it backwards on a wet foundation and the mortar simply never goes off.
I've specified both, and I've made the wrong call on both. Here's the decision framework I now use, worked out the hard way.
Key Takeaways
- Hydraulic lime hardens through a chemical reaction with water; non-hydraulic lime hardens by absorbing CO₂ from the air.
- Non-hydraulic lime needs air and time: initial set in a day or two, full carbonation over weeks to many months depending on thickness and exposure.
- Soft, old, solid-wall masonry wants the weakest, most breathable binder you can get away with. That usually means non-hydraulic.
- Damp, exposed, thick-section or underwater work needs hydraulics. NHL 3.5 covers most of it; NHL 5 is for genuinely harsh conditions.
- Lawn lime is a different product entirely — agricultural ground limestone, not building lime.
- When in doubt on historic fabric, go weaker. You can always repoint; you cannot un-crush a soft stone.
Hydraulic lime vs non-hydraulic lime: the difference that actually matters
Both start as limestone. What changes is what happens in the kiln and, more importantly, what's in the raw stone.
How each one hardens
Limestone with clay minerals mixed through it, fired at the right temperature, produces calcium silicates and aluminates. Add water and those compounds hydrate and harden — much like cement, only gentler and slower and far more vapour-permeable. That's natural hydraulic lime, sold as NHL with a strength grade: NHL 2, NHL 3.5, NHL 5. The number is compressive strength in N/mm² after 28 days.
Pure limestone without those clay impurities, fired and then slaked in excess water, gives you lime putty. It hardens by carbonation: the lime reacts with atmospheric CO₂ and slowly turns back into calcium carbonate. It needs air. No air, no set. Bury it in a saturated wall and it stays soft indefinitely.
Those two mechanisms drive every practical difference that follows.
Why breathability is the real argument
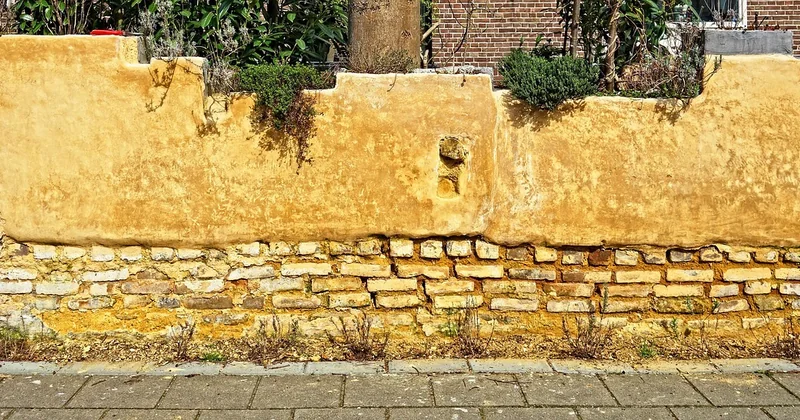
Higher hydraulics mean a denser, stiffer, less vapour-permeable mortar. That's fine on a modern cavity wall with a damp-proof course. On a solid stone wall with no cavity and no DPC, moisture has to leave through the surface. A stiff, low-permeability mortar traps it, and trapped moisture finds the path of least resistance — usually through the stone itself. Soft sandstone and limestone lose that fight.
I watched this play out on a barn conversion I consulted on. Previous owner had repointed a rubble limestone wall in a cement-rich mix. Within a few seasons the faces of the stones had started to shell off. The pointing was intact. The stone wasn't.
Should you use hydraulic or non-hydraulic lime?
Ask yourself one question first: can this element dry out through its face, and does it need to?

If it's a sheltered, breathable, traditionally built wall where the mortar is meant to be the sacrificial layer, non-hydraulic. If it's exposed to driving rain, sits below ground, gets frost, or needs to go off in a reasonable working window, hydraulic.
A decision table you can actually use
| Situation | Binder | Why |
|---|---|---|
| Repointing soft or friable stone, sheltered elevation | Non-hydraulic putty, 1:2.5 to 1:3 with sharp sand | Weakest, most permeable option; lets stone dry and stays flexible |
| Same wall, fully exposed to weather | NHL 2 or feebly hydraulic | A little hydraulicity buys frost resistance without sealing the wall |
| External render on solid brick or cob | NHL 2 to NHL 3.5 | Needs to shed rain but still breathe |
| Damp plinth, retaining wall, below-DPC masonry | NHL 3.5 to NHL 5 | Prolonged wetting; carbonation-set lime won't perform |
| Rendered or pointed work in frost-exposed areas | NHL 3.5 | Reasonable freeze-thaw tolerance |
| Interior plaster on lath or masonry | Non-hydraulic putty | Slow, flexible, easy to work; interior needs no weather resistance |
| Setting stone or brick in a new garden wall | NHL 3.5 | Practical set times for a build that's exposed |
| Underwater or permanently saturated | NHL 5 or an explicitly hydraulic lime | Only hydrolysis works here |
Two things this table doesn't tell you, and they matter more than the table itself.
First, mortar strength should sit below stone strength. Always. A mortar stronger than the masonry it binds will sacrifice the masonry instead. On a soft stone, that means going weaker than feels comfortable. Second, temperature and wind govern your working life so much that the same mix behaves like two different materials in July and November. I've had putty mortar start going off in under two hours on a hot, breezy west-facing wall, and sit workable for most of a day on a cool north elevation.
The mistake I made
Early on, I specified NHL 3.5 across an entire cottage — pointing, bedding, render, the lot. It was efficient. One pallet, one mix, one spec. On the soft limestone quoins on the north elevation it was too hard, and after a couple of seasons I could see hairline cracks tracking along the stone faces rather than through the joints. That's the wrong way round. The joints should be what fails first. I ended up cutting out and redoing two elevations in a feebly hydraulic mix over the following spring. Total waste of effort, all because I'd optimised for simplicity instead of for the building.
How long does it take for non-hydraulic lime mortar to set?
Initial set in roughly a day or two, in reasonable weather. Full carbonation over weeks to many months, and it depends heavily on thickness, exposure and how much air can reach the joint.
Here's the sequence in practical terms:
- Workable life: a few hours, more in cool humid conditions, much less in heat and wind
- Initial stiffening: 24 to 48 hours typically
- Hard enough to handle carefully: around a week
- Substantially carbonated through a normal joint: several weeks
- Fully carbonated in a deep or thick section: many months, sometimes longer
Two practical consequences. Keep lime work damp for the first few days after laying — mist it, cover it, protect from sun and wind. And don't judge a non-hydraulic mortar by how it feels at day three. It isn't weak; it's young. Which is a different thing.
One caveat I'd flag: carbonation needs CO₂ to penetrate. A deep, dense, wide joint carbonates from the outside in, and the core can take a very long time. That's a feature on old walls where flexibility matters, and a nuisance on anything where you need strength quickly.
What is hydraulic lime used for?
Broadly: anywhere you need lime's breathability but can't afford to wait for air.
Ground conditions are a big one. Foundations, plinths, retaining walls, anything that sits where water collects — carbonation-set mortars underperform there because the moisture excludes the air they need. Exposure is another: chimney stacks, parapets, coastal elevations, frost pockets. Hydraulic lime also wins on practical schedule. A mortar that goes off in a sensible window lets you get work done, and on a commercial refurbishment programme that's not a compromise, it's the only viable option.
NHL grades are a sliding scale of stiffness, not a quality scale. Higher is not better — it's just harder and less permeable. NHL 3.5 is the workhorse for most exposed general-purpose work. NHL 5 is for genuinely aggressive conditions and I'd avoid it on anything soft or historic. NHL 2 is where you want to be on delicate fabric that still needs some weather resistance.
What is the best lime to use on your lawn?
Agricultural ground limestone, and it has nothing to do with the bags in your builder's merchant.
Lawn lime is a soil amendment — crushed limestone spread to raise pH in acidic ground. Building lime is a binder. Using hydrated builder's lime on a lawn is a bad idea: it's caustic, it burns foliage on contact, and it's far more reactive than soil needs. Horticultural or agricultural ground limestone is the slow-release, soil-appropriate product.
Test your soil pH before you spread anything. If it's already neutral or alkaline, adding lime is at best pointless. This is one case where the answer genuinely depends on a measurement rather than a judgement call.
Where to buy non-hydraulic lime, and what to ask for
Lime putty and bagged non-hydraulic products come from specialist suppliers rather than general builders' merchants, and that's usually a good thing — the people behind the counter know the difference between putty and NHL without needing an explanation.
Ask for:
- Non-hydraulic lime putty, ideally matured. Older putty is smoother and easier to work.
- Natural hydraulic lime with the grade stated explicitly on the bag — NHL 2, 3.5 or 5 — not just "hydraulic lime."
- A supplier who can tell you the aggregate grading they recommend for your application, not one who hands you a generic sharp sand and wishes you luck.
Terminology trips people up constantly. Lime putty, fat lime, hot lime, hydrated lime, formulated lime, semi-hydraulic lime — these aren't interchangeable, and a bag labelled "hydraulic lime" without a grade is a bag you should put back on the shelf. If the spec doesn't tell you the strength class, you don't know what you're buying.
Which one wins
On historic and traditionally built fabric, non-hydraulic lime wins almost every time — not because it's romantic, but because it's the softer, more permeable, more forgiving material, and old buildings were designed around those properties. On anything exposed, wet, or structurally demanding, hydraulic lime wins on practical grounds. The two are not rivals. They're different tools, and the mistake is reaching for the same one on every job.
The question I'd leave you with: if you had to come back to that wall in fifteen years, which failure would you rather be looking at? A joint you can cut out and redo, or stone faces you can't put back?