There's a particular kind of silence in a field bounded by dry stone. No mortar, no cement, no visible joint — just hundreds of stones that have decided to hold each other up. Walk past one and you might not look twice. Stop and put your hand on it and the question arrives quickly: how does this not fall over?
For anyone working on dry stone walling techniques for heritage landscapes, that question is the whole job. These walls aren't decorative leftovers. They're infrastructure, some of them centuries old, many of them still doing exactly what they were built to do: holding a slope, marking a boundary, sheltering livestock and a small city of invertebrates. And the techniques that built them are more specific than most people assume.
Key takeaways
- A dry stone wall relies on three things: gravity, friction, and a core of small stones that locks the two faces together.
- The batter — the inward lean of each face — is not optional; it's what keeps the wall standing after decades of frost.
- Round fieldstone can be used, but it demands more sorting and more core material than flat quarried stone.
- Repair work on heritage walls is a discipline in itself: dismantling, setting aside the hearting, and rebuilding to the original profile.
- UNESCO recognises the craft as intangible cultural heritage, which has real consequences for how these landscapes are maintained.
What makes a dry stone wall stand without mortar
Two faces of stone, each leaning slightly inward, filled between with a mass of small irregular stones. That's the principle. Everything else is detail — and the detail is where walls fail.
The outward lean is called batter. A wall one metre high typically rises with its faces tilted in by roughly a tenth of its height, so each face moves inward about 10 centimetres over the full elevation. This means the centre of gravity of each face sits further back than its base. Push on the top of a well-built wall and it resists as a whole, because the two faces are wedged against a packed core that has nowhere to move.
Why hearting is the real structure
Beginners always underestimate the middle. The small stones packed between the two faces — called hearting in the trade, sometimes "filling" — are what transmit force between the faces and prevent each one from rolling into the gap. A wall built with big stones and no hearting will look fine for a season, then start to belly out.
When I first tried building a section on my own land, I used what I had: large, roughly rounded granite. I skipped the laborious part, the small stuff. The wall stood for about fourteen months, then a February thaw dropped one face into the field. Total waste of time, entirely predictable in hindsight.
Stone selection and sorting
Sorting is where most of your time goes. Set stone into rough piles by size before you lay anything:
- Larger, flatter stones for the two faces — these carry the load
- Medium stones for the interior structure and for building up courses
- Small angular fragments for hearting
- Long flat slabs reserved for through-stones, laid across the full width every metre or so to bind the two faces
That last category matters more than its share of the pile suggests. Through-stones, sometimes called bond stones, are what stop the faces from acting independently.
Dry stone walling techniques, step by step
Get the foundation wrong and nothing above it will save you. The trench should be dug to firm subsoil and, ideally, slightly wider than the wall's base so the bottom course sits on undisturbed ground rather than on loose fill.
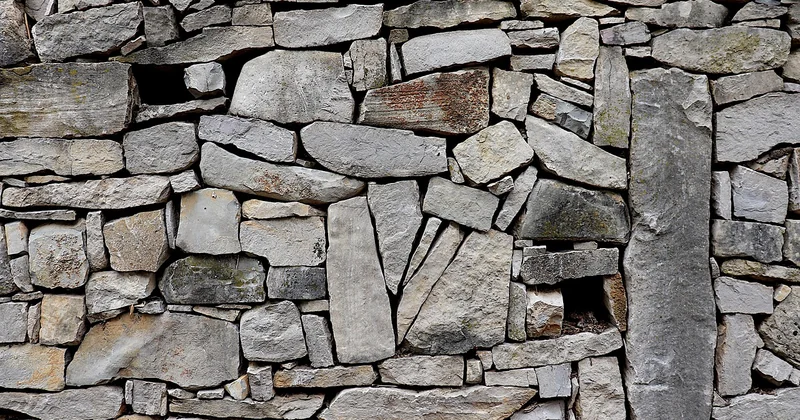
Foundation and first course
The first course is laid with the largest stones, set flat and bedded down. Each one should sit stable before you move on to the next — if a stone rocks when you press it, it will rock worse a year from now. This is slow, unglamorous work and there's no shortcut.
Building the two faces
You're building two walls at once, and they must rise together. Lay a stone on one face, then a corresponding stone on the other, keeping the courses level with each other. Between them, pack hearting continuously — not at the end of the section, but as you go, so that each new face stone is wedged against an already-solid centre.
Every stone should sit on its broadest face and should span at least two stones beneath it, so that no vertical joint lines up with the joint below. That staggered arrangement is what spreads load instead of delivering it straight down through a weak line.
Coping and finish
The top of the wall carries the coping — large stones set on edge, or a double row laid flat depending on regional tradition. On edge coping sheds water and, in many upland areas, provides the distinctive serrated silhouette you see across the landscape. Whichever style you use, the coping must be heavy enough to weigh down the courses beneath it.
Building with round stones, and the retaining wall problem
Round stone is harder. Not impossible, just harder, because rounded surfaces offer little friction and no natural bedding plane. The workarounds are consistent:
- Sort aggressively and reserve only the flattest available stone for the faces.
- Use substantially more hearting than you would with quarried stone — the gaps around round stones are larger and must be filled.
- Set through-stones more frequently, and use flat slabs to create level bedding planes every few courses.
- Accept a wider wall. A round-stone wall needs more mass to achieve the same stability.
Dry stone retaining walls
A retaining wall is a different animal from a freestanding field wall. It holds back earth, which means it also holds back water. Two features become non-negotiable: a batter that leans into the slope more steeply than a freestanding wall would, and a backfill of clean, free-draining stone behind the face so that water can move down and out rather than building pressure.
Skip the drainage and you've built a dam with a stone face. I've seen that failure twice, and both times the wall went over after heavy rain, not gradually.
Heritage walls: repair discipline and the UNESCO dimension
Working on a protected landscape is a different brief from building on your own ground. The craft of dry stone construction is inscribed on UNESCO's list of intangible cultural heritage, submitted jointly by a group of European countries including Ireland, France, Spain, Italy, Greece, Croatia, Slovenia, Cyprus, Belgium, Luxembourg, Andorra and Austria. In practice this recognition does two things: it raises the profile of the skill, and it strengthens the argument for training and for proper specification in publicly funded landscape work.
How to repair a collapsed section
The correct approach is closer to archaeology than construction:
- Photograph the standing wall either side before you touch anything
- Dismantle the damaged section down to sound stone, and set the hearting aside separately — you will need it
- Rebuild to the original height, batter and coping style, matching the local stone if you can source it
- Keep new work distinct from old on the reverse face if the specification asks for it, so future surveyors can read the history
Mixing new and salvaged stone badly on the visible face is the mistake I see most often in heritage work. It reads as a patch to anyone who knows the landscape, and it can be hard to undo.
| Wall type | Faces | Batter | Drainage need |
|---|---|---|---|
| Field boundary, freestanding | Double, with hearting | Moderate inward lean on both faces | Not required |
| Retaining wall | Single face, hearting against slope | Steeper lean into the bank | Essential — clean stone backfill |
| Single-face ornamental | One visible face | Follows the supporting structure | Depends on the backing |
Learning the craft properly
Reading about batter and hearting gets you the vocabulary. It doesn't get you the feel for how a stone sits. Most people I know who build well learned by working alongside someone with thirty years of walls behind them, and by rebuilding the same five metres of a collapsed section more times than they'd care to admit.
The Dry Stone Walling Association in the UK runs courses and a certification scheme, and similar guilds and training programmes exist in Ireland, France and parts of Spain and Italy. If you're serious about heritage landscape work, a structured course is worth the cost — you'll pick up in two days correction you'd otherwise spend a year missing.
What the craft asks of you, in the end, is patience with a slightly absurd premise: that a pile of stones, correctly arranged, will outlast the person who stacked them, without a gram of binder to hold it together. Every dry stone wall is a small argument that careful arrangement beats brute adhesion. The ones still standing after two hundred winters have already won that argument.