You can spot a bad repointing job from thirty feet away. Not because the mortar is the wrong colour — that takes closer inspection — but because the joints are all wrong. Flat, smeared, buttered across the face of the stone like icing on a cake. The wall has lost its texture, its depth, its age. Somebody spent four thousand pounds to make an old building look like it was rendered in plastic.
The irony is that the joint profile — the shape of the mortar where it meets the stone or brick face — is one of the few things in masonry that costs nothing extra to get right. It's a choice. You either make it deliberately or you make it by accident. There is no third option, and the accident is always flush.
Three profiles matter more than all the others combined: flush pointing, recessed pointing, and weatherstruck pointing. They look different, they behave differently against water, and each one signals something about the era of the building and the intent of whoever built it. Get the wrong one and you'll be back on the scaffold within a decade.
Key takeaways
- Flush joints sit level with the masonry face; recessed joints are raked back to create a shadow line; weatherstruck joints slope inward from a raised bottom edge to shed water.
- The profile affects how water leaves the wall far more than it affects how the mortar sets.
- Recessed pointing on soft, porous stone in a wet climate is a maintenance commitment, not a one-off job.
- Weatherstruck pointing is the most weather-resistant of the three, but it looks wrong on medieval rubble work.
- A tooled finish — done with a joint iron or beaded pointing tool — compacts the mortar surface, which matters more than the profile itself.
- Raking out old mortar for a recessed finish can do more harm than good if the joint is already shallow.
Why joint profiles matter more than most people think
Mortar is the sacrificial layer. It is designed to wear, erode, and be replaced so that the stone or brick behind it survives. That logic only works if the mortar surface is properly compacted and if water runs off it rather than sinking into it.
A joint profile controls two things at once: the surface density of the mortar (compacted or merely smeared) and the path water takes as it leaves the wall. A flat joint that has been pressed hard with an iron sheds water reasonably well. A flat joint that has been wiped with a damp sponge and left soft will draw water in like a wick.
The contradiction nobody resolves
Search around and you'll find guides claiming flush pointing "minimises water penetration" sitting alongside guides claiming flush joints "are not water-resistant." Both are half right, and the reason they disagree is that they're describing different executions of the same profile.
Flush mortar that has been compacted and left slightly proud, with a dense closed surface, performs fine on a sheltered elevation. Flush mortar that has been sponged back to a soft, sandy finish on a west-facing wall in driving rain will absorb moisture and then release it slowly through evaporation — which is fine until there's a frost. Do that twenty times and the face of the brick starts to spall.
So the argument isn't about flush versus recessed. It's about whether the mortar was tooled or wiped. That distinction is missing from most instruction you'll find.
Flush pointing: the default, and its hidden cost
Flush pointing means the mortar is finished level with the face of the masonry, with no rake back and no shape. It's the fastest profile to produce and the easiest to teach. Give a labourer a trowel and a bit of burlap and they'll give you a flush joint on the first day.
That speed is exactly why it's the most common finish on modern blockwork, on mass-produced brick, and on any job where the mortar is a means to an end rather than part of the design. On a 1970s extension it looks absolutely right. On a Cotswold stone cottage it looks like a mistake.
Where flush pointing actually belongs
- Modern brickwork where the brick itself carries the visual interest and the joint is meant to disappear
- Elevations sheltered from prevailing weather
- Any situation where joint depth is too shallow to rake back safely
- Repointing where the original finish was genuinely flush — match the building, not the book
Notice what's not on that list: exposed coastal elevations, hard-fired brick in a freeze-thaw climate with no eaves overhang, or anything where the aesthetic of the wall depends on reading individual stones. Flush mortar erases the lines between units, and on natural stone that's a loss you can't undo without grinding.
My own experience: on a small garden wall in a sheltered courtyard I used flush pointing deliberately, finished tight with a metal iron rather than a sponge, and it's held up for eleven years without a single cracked joint. The same mix, wiped with a sponge on an exposed gable, showed hairline crazing within two winters. Same profile on paper. Completely different mortar on the wall.
Recessed pointing: shadow lines and real risk
Recessed pointing rakes the mortar back from the face, typically by a few millimetres — enough to cast a shadow line but not so deep that water pools on a ledge. The visual effect is immediate: the individual stones or bricks read as separate units, the wall gains depth, and the texture of the masonry becomes the point.

It's also the profile with the biggest gap between what people expect and what they get.
What the shadow line costs you
A recessed joint holds water. Not forever, but long enough. The recess creates a horizontal ledge at the bottom of each joint where rain sits before it either evaporates or finds its way in. On a hard, dense stone that's tolerable. On a soft, porous limestone or a handmade brick, that ledge is a soaking point.
In a climate with regular freeze-thaw cycles, water sitting in a recessed joint expands when it freezes and gradually works at the bond between mortar and masonry. You won't see it in year one. You'll see it in year eight, as a series of joints that have started to let go along the top edge.
Depth matters enormously here. A 3–5 mm recess gives you the shadow and keeps the ledge small. A 10 mm recess — which I've seen specified more than once, usually by someone imagining a deep, dramatic joint — is asking for trouble on anything soft or exposed.
When recessed is the right call
It's the right finish for good-quality ashlar, for flint work where the joints want to recede and let the stones dominate, and for sheltered elevations where you want the masonry to read clearly. Historically it's a common finish on Georgian and Victorian brickwork of decent quality, and matching that on a repair is the whole point.
The one thing to check before committing: how deep is the existing joint? If the wall has already been repointed a couple of times, the joint depth may only be a few millimetres. Raking out further to achieve a recessed profile means cutting into the masonry itself, and on soft stone that damage is permanent. In that situation, flush is the honest answer.
Weatherstruck pointing: sloped for water
Weatherstruck pointing — also called weathered pointing — finishes with the mortar sloping inward from a slightly raised bottom edge up to the masonry face above. In cross-section, each joint looks like a tiny ramp pointing at the sky. Water that lands on it runs down and off rather than sitting.
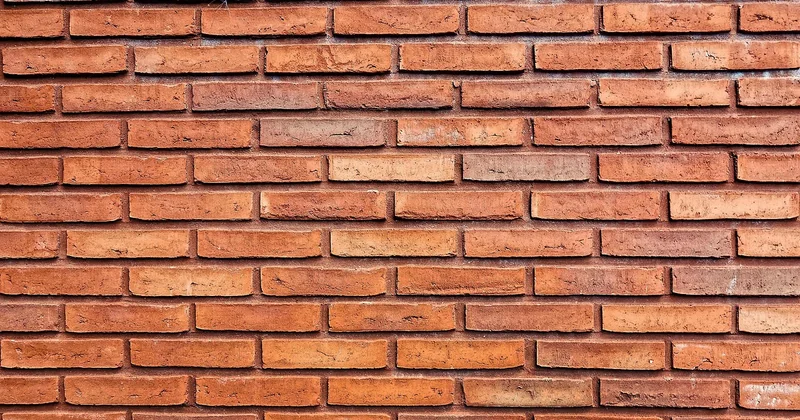
It's the most effective of the three profiles for shedding rain on a vertical wall. That's not an opinion, it's just geometry: a sloped surface has no ledge for water to rest on.
The tooling problem
Weatherstruck is also the hardest of the three to do consistently, and the one where bad workmanship is most visible. Getting a uniform slope across hundreds of joints takes a steady hand and a shaped tool. The mortar needs to be firm enough to hold the profile as the tool passes but soft enough to compact — which is a narrower window than most people expect, maybe twenty minutes after mixing on a warm day.
Use a dedicated joint iron or a beaded pointing tool to form the slope, and be rigorous about the angle. Roughly 15 to 20 degrees back from vertical is the usual target. Too shallow and you've just made a flush joint with extra steps. Too steep and you've created an overhanging lip at the bottom of the joint that catches water instead of shedding it.
The catch? Weatherstruck looks wrong on some masonry. On medieval rubble, flint, and irregular fieldstone, the sloped profile fights the natural shape of the units and reads as fussy. It belongs on regular brick and on squared stone where the courses are consistent enough for the slope to repeat cleanly.
Comparing the three profiles side by side
Here's the comparison I wish I'd had when I first started choosing between these.
| Profile | Depth / form | Water behaviour | Best suited to | Main risk |
|---|---|---|---|---|
| Flush | Level with masonry face, compacted with iron | Relies on surface density; sheds reasonably if hard-tooled | Modern brick, sheltered walls, shallow joints | Soft sponged finish absorbs water and frost-damages the masonry |
| Recessed | Raked back roughly 3–5 mm | Ledge holds water; slow evaporation | Ashlar, flint, sheltered elevations, heritage repairs | Deep recesses on soft or exposed stone; frost damage at the joint edge |
| Weatherstruck | Sloped inward, approx. 15–20° from vertical, raised bottom edge | Best drainage of the three; no ledge | Regular brick and squared stone on exposed elevations | Hard to execute uniformly; wrong visual fit on irregular rubble |
| Beaded | Rounded bead (often formed with a beaded pointing tool) | Decorative; sheds adequately when well formed | Victorian-era detailing, specific heritage contexts | Bead edge vulnerable to erosion; requires matching existing work |
Does the tool matter more than the profile?
Honestly? On the performance side, yes. A hard-tooled flush joint made with a metal iron will outperform a sloppy weatherstruck joint every time — because the tooling compacts the mortar's surface into a dense, closed skin, and that skin is what resists water ingress. The profile shapes where water goes; the tooling determines whether the water can get in at all.
That's why the beaded pointing tool gets specified on heritage work even where the joint profile is nominally one of the three main types. It creates that closed, burnished surface while also forming the bead. If you take one thing from this, take this: finish every joint with a tool, never a sponge.
Choosing the right style for the wall in front of you
The decision comes down to four variables, and they don't all point the same way.
- What was there originally? On any building over about eighty years old, this outranks everything else. Repointing in a profile the building never had is a permanent change, and on listed or conservation-area property it's often not permitted.
- Exposure. A west-facing elevation in a wet, windy climate puts the joint under far more stress than a sheltered courtyard. Weatherstruck earns its keep here.
- Masonry hardness. Soft, porous stone and handmade brick favour profiles that minimise standing water. Hard, dense engineering brick tolerates more.
- Available joint depth. If there's only 4 mm of joint to work with, a recessed profile is off the table. Raking deeper cuts into the masonry and causes damage that no amount of good mortar will fix.
Where those four align, the answer is usually obvious. Where they conflict — say, a soft limestone wall, a west-facing elevation, and a heritage requirement for recessed joints — you have a genuine trade-off, and the right move is to reduce the recess to the minimum that preserves the look, use a lime mortar matched to the stone's permeability, and accept that the joints will need inspection periodically.
One thing I'd push back on hard: the instinct to chase a deep, dramatic recessed joint on a soft wall because it photographs well. It does photograph well. It also fails first. The picture you're copying was probably taken within a year of the work being done, not fifteen.
What stays with me after all this is how much weight sits on something so small. A joint is a few millimetres of material in a wall tens of metres long, and its profile decides whether that wall dries out or slowly falls apart. Get it wrong and nobody notices for a decade. Get it right and nobody notices at all — which, in masonry, is the highest compliment available.